 Menu
Menu


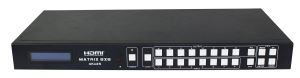
8x8 HDMI Matrix With EDID Control (VU-MA09)
-
Min Order
1
-
Product Unit
Pieces
-
Origin
China Mainland
-
Payment


- Contact Now Start Order
- Favorites Share
- Description
Product Detail
1.Introduction The 8x8 HDMI Matrix with EDID control connects eight HDMI sources to eight displays. This matrix provide eight HDMI outputs and each HDMI output is supporting 1080p Full HD up to 4K plus all 3D formats and supporting independent EDID control. It works with Blu-Ray players, Set-Top boxes, Home Theater PCs, and game consoles that connect to an HDMI display. Any source is accessible at all times by any display by selecting it via the supplied IR Remote Control, RS-232, TCP/IP or by using the selection buttons on the front panel.
2.Features l HDMI V1.4 supports: 4K x 2K@30Hz,1080P@120Hz,and 1080P 3D@60Hz l Deep Color support 48/36/30/24-bit l Supports LPCM 7.1CH, Dolby True HD, Dolby Digital Plus and DTS-HD Master Audio transmission l Allows any source to be displayed on multiple displays at the same time l Allows any HDMI display to view any HDMI source at any time l 8-input ports support independent EDID l Supports RS-232, remote control, on-panel control and TCP/IP Control l Front-panel LCD display for status feedback
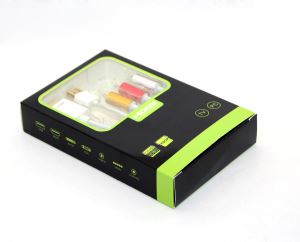
3.Package Contents l 8x8 HDMI Matrix--------------------------------------------------------------1pc l 12V/3A DC power adapter--------------------------------------------------1pc l Operation Manual------------------------------------------------------------1pc l HDMI Matrix IR Remote-----------------------------------------------------1pc l Mounting ears-----------------------------------------------------------------2pc l RS232 cable--------------------------------------------------------------------1pc 4.Specifications
Video Bandwidth 297 MHz Support Video Resolution 480i,576i,480p,576p,720p,1080i,1080p @24/30/50/60Hz, 4K@30Hz, 1080P3D@60Hz Input Ports 8×HDMI, 1×RS-232, 1xRJ-45(Control) Output Ports 8×HDMI ESD Protection Human-body Model: ± 8kV (Air-gap discharge) ± 4kV (Contact discharge) Power Supply 12 V/3 A DC (US/EU standards, CE/FCC/UL certified) Dimensions 440 mm (W)×200 mm (D)×45 mm (H) Weight 2310 g Chassis Material Metal Silkscreen Color Black Operating Temperature 0 ºC~40 ºC/32 ºF~104 ºF Storage Temperature -20 ºC~60 ºC/-4 ºF~140 ºF Relative Humidity 20~90 % RH (non-condensing) Power Consumption 23 W(max)/0.5w(Standby) 5. PANEL FUNCTIONS 5.1 Front Panel
1. LCD display:Show the status of input-output selection, EDID info and so on. 2. IR receiver window:Receive the IR from the remote control of 8x8. 3. POWER:Press this button to power the device on/off. The LED will illuminate green when the power is on, red when it is in 'Standby' mode. 4. LOCK:Press this button to lock all the buttons on the panel, press again to unlock. The red LED will illuminate when the button is locked, on the contrary, turn dark when unlock. 5. HDMI output selection button area: HDMI output selection button 1 to 8:Press to select the output from 1 to 8. All button for HDMI outputs:Press to select all of the outputs from 1 to 8. 6. HDMI input selection button area: HDMI input selection button 1 to 8:Press to select the input from 1 to 8. 7. PTP button:Press to mirror all inputs and outputs (e.g. output 1 to input1, output 2 to input2 and so on). 8. EDID control area: Menu button:Press to enter EDID set mode. Enter button:Press to confirm and save the setting. UP button:Press to change segment's value. Down button:Press to change segment's value. ?Note: The EDID mode table 1. #1 submenu:EDID mode table NumberEDID Description11080i, 2CH AUDIO21080i, DOLBY/DTS 5.131080i, HD AUDIO41080p, 2CH AUDIO51080p, DOLBY/DTS 5.161080p, HD AUDIO73D,1080p, 2CH AUDIO83D, 1080p,DOLBY/DTS 5.193D,1080p, HD AUDIO104k*2k, 2CH AUDIO114k*2k, DOLBY/DTS 5.1124k*2k, HD AUDIO13DVI 1024x76814DVI 1920X108015DVI 1920X120016Copy from HDMI OUTPUT117Copy from HDMI OUTPUT218Copy from HDMI OUTPUT319Copy from HDMI OUTPUT420Copy from HDMI OUTPUT521Copy from HDMI OUTPUT622Copy from HDMI OUTPUT723Copy from HDMI OUTPUT8
. 2#2 submenu:Input ports selection NumberInput port Description1Input 12Input 23Input 34Input 45Input 56Input 67Input 78Input 89Input ALL EDID. What is it and what is it used for? Under normal circumstances, a source device (digital and analog) will require information about a connected device/display to assess what resolutions and features are available. The source can then cater its output to send only resolutions and features that are compatible with the attached device/display. This information is called EDID (Extended Display Information Data) And a source device can only accept and read one EDID from a connected device/display. Likewise, the source can only output one resolution for use by a connected device/display. Why is EDID so important with the HDMI Matrix ? The Matrix is complex piece of technology that replicates and switches between multiple inputs and outputs. Each connected source device will require one EDID to read. EDID management is carefully handled by HDMI Matrix to provide a single EDID for each source to read. What options do I have to manage the EDID in the HDMI Matrix ? First, it is important to note that each source device can only output one video/audio signal type. This includes resolutions and timings. When multiple devices/displays are used, such as with the HDMI Matrix, it is important to use devices/displays that have similar or compatible resolutions/features. This will ensure that the single video/audio signal produced by the source device is accepted by all of the connected output devices/displays. The user has the option, through the EDID management window, to choose how the unit will manage the EDID from multiple HDMI devices/displays. Therefore the user has some control over the resolutions/features that the source devices will output. The HDMI Matrix for has a multiple EDID management modes that will control how the EDID information from multiple devices/displays are combined, ignored, and routed. How to operate the HDMI Matrix? 1. How to select Output and Input Port? Q. OUTPUT-X select INPUT-Y: A. Press OUTPUT-X (X means 1 to 8 of outputs, including ALL) Press INPUT-Y (Y means 1 to 8 of inputs) 2. How to change INPUT-Y EDID Q. Fixed EDID to INPUT-Y/ALL: A. Press MENU button to enter EDID set mode. Press UP/DOWN button to select the EDID you want. Press ENTER button ensure and enter Input port submenu. Press UP/DOWN button to select Input port you want. Press ENTER button ensure and save the setting. 5.2 Rear Panel
1. PC CONTROL:Show the status of input-output selection, EDID info and so on. TCP/IP: This port is the link for TCP/IP controls, connect to an active Ethernet link with an RJ45 terminated cable. RS232: Connect to a PC or control system with D-Sub 9-pin cable for the transmission of RS-232 commands. 2. HDMI INPUT Area:Connect HDMI sources. LED 1-8 illuminate when the HDMI signal plug in corresponding input port with HDMI cable. 3. HDMI OUTPUT Area:Output for displays, AVR etc. LED A-H illuminate when the displays plug in corresponding output port with HDMI cable. 4. Power port:Use included DC adaptor to power the matrix switcher. 6.Remote Control
Power on /Standby:Press this button for power on the matrix or set it to standby mode. 1. Input port selection area:Press these buttons to select input 1-8. Press forward/backward button will cycle from input 1-8. 2. Output port selection area:Press these buttons to select output A-H, including ALL.
How to operate the Matrix Remote? 1. Power on and standby Q. How to power on and standby? A. Press Power on /Standby button and wait a while.
2. How to select Output and Input Port? Q. OUTPUT-X select INPUT-Y: A. Press OUTPUT-X (X means 1 to 8 of outputs, including ALL) Press INPUT-Y (Y means 1 to 8 of inputs) 7. PC controller user guide Installation Matrix controller is a green software. Just copy MatrixController.exe to PC which is used to control the Matrix by RS232 COM port or TCP/IP to complete installation. Preparation ? Connect PC and Matrix by RS232 cable (headers of both sides of cable should be FEMALE) or TCP/IP(local area network) ? Power-up Matrix ? Double click MatirxController.exe icon to run it How to control Matrix ? “General” page
Select RS232 COM or TCP mode ? Select RS232 COM port ? Click to connect or disconnect PC and Matrix ? Select Matrix IP ? Connet to Matrix IP ? Search Matrix IP ? Configure Matrix IP and MAC ? Enable or disable IR /beep ? Device information display area ? Click to refresh device status: include device information displayed in ? area and Input/Output Settings on “Matrix” page Ø Configure TCP
After action of ? , edit form will pop-up as below:  1.Select auto or static IP ? 2.Rewrite the Matrix IP ? 3.Rewrite the Matrix MAC ? “EDID control” page
1.Set EDID mode for select Input port or All Input ports, click “Set” button to complete action ? 2.Select EDID ? 3.Select Input port ? 4.Copy EDID from Output port to selected Input port or All Input ports, click “Set” button to complete action. ? 5.Select Output port ? 6.Download EDID content to selected Input port or All Input ports, click “Download” button to complete action. ? 7.Open EDID binary file ? 8.Display EDID binary file path ? “Matrix” page 
1.LED which display Input number for respective Output ? 2.Click to select Input port for respective Output port ? 3.Click to select previous or next Input port for respective Output port ? “FW upgrade” page
1.Click to open FW file(file extension is “.fw”) ? 2.Display the FW file path ? 3.Displaying the progress of the software upgrade ? 4.Click to upgrade the Matrix software ? 5.Display the message of the software upgrade ? 6.Clear the message of the software upgrade 8. Operate and Connect
1. Connect up to 8 sources such as a Blu-Ray Player, game console, A/V Receiver, Cable or Satellite Receiver, etc. to the HDMI inputs on the unit. Do not hot plug! Insert and extract cables carefully with the power SWITCHED OFF. Connecting and disconnecting while the unit is powered can result in damage to circuitry. 2. Connect the HDMI output ports to high-definition displays such as an HDTV or HD projector that use HDMI inputs. Note that high-speed HDMI cables are recommended for the distances that are required for each connection. 3. For power, plug in the source first, followed by the Matrix Selector Switcher (power supply included), followed by each output connected. 4. Power on each device in the same sequence. At this point each display connected should display the assigned source (input 1 at default when powered on initially), scroll through each of the sources on each display to ensure everything is in working order. Use included IR remote to test switching function. If a display is having difficulty receiving signal, access the display’s menu and adjust the resolution (lowest to highest until signal is displayed). A 24 Hz vertical refresh rate may work better than 60 Hz or higher. |


-
Gradeability Conveyor Belt

US $8.72-19.17 / Price
1 Pieces / (Min. Order) -
Da Baoji High-profile Type 1 Pieces / (Min. Order)

-
STRAPPING MACHINE(LOW TABLE)KZB-II 1 Pieces / (Min. Order)

-
R3012 Ko Monochrome Ribbon 1 Pieces / (Min. Order)

-
Servo Control Adapter 1 Pieces / (Min. Order)

-
Manual Control Valve 1 Pieces / (Min. Order)

-
Manual Control Valves 1 Pieces / (Min. Order)

-
BOP Control Hose 1 Pieces / (Min. Order)

-
RK3128 Quad Core Google Android 4.4 Box for TV 1G 1 Pieces / (Min. Order)

-
The Golden Lion Shaped Nylon Dog Toys 1 Pieces / (Min. Order)

-
Round Tin Can For Popcorn 1 Pieces / (Min. Order)

-
Endoscope Control Knobs 1 Pieces / (Min. Order)
-
All In One VR Headset With Remote Control CE RoHs 1 Pieces / (Min. Order)

-
Rapid Endotoxin Gel Clot Assay Test Kit 1 Pieces / (Min. Order)

-
Radiator for LDV MAXUS V80 1 Pieces / (Min. Order)

-
Radiator for LDV MAXUS G10 1 Pieces / (Min. Order)
-
Yucca Schidigera 50% Saponins For Control Odors 1 Pieces / (Min. Order)

-
SANY Excavator Control Motor 1 Pieces / (Min. Order)

-
Vibration Conveyor Mass Conveyor 1 Pieces / (Min. Order)

 Favorites
-
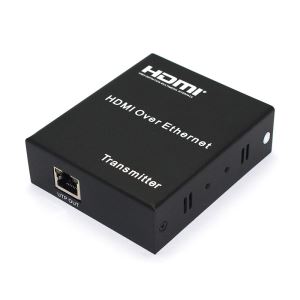
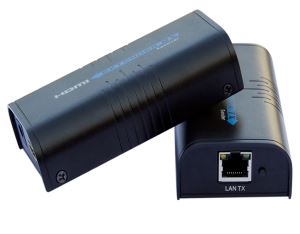
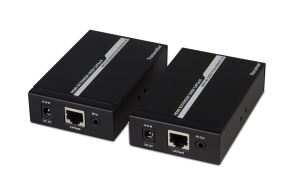
 HDMI Extender Over One CAT5E/CAT6(TCP/IP) (VU-EX06)
1 Pieces / (Min. Order)
HDMI Extender Over One CAT5E/CAT6(TCP/IP) (VU-EX06)
1 Pieces / (Min. Order)
-
 2 To 4 VGA Matrix Switch (VU-VM04)
1 Pieces / (Min. Order)
2 To 4 VGA Matrix Switch (VU-VM04)
1 Pieces / (Min. Order)
-
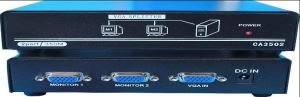
 4 To 4 VGA Matrix Switcher (VU-VM03)
1 Pieces / (Min. Order)
4 To 4 VGA Matrix Switcher (VU-VM03)
1 Pieces / (Min. Order)
-
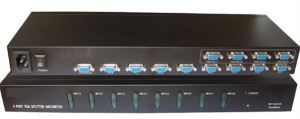 8 To 4 VGA Matrix Switcher (VU-VM02)
1 Pieces / (Min. Order)
8 To 4 VGA Matrix Switcher (VU-VM02)
1 Pieces / (Min. Order)
-
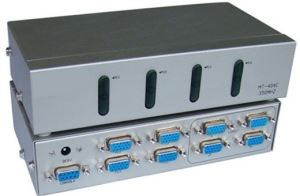
 2 Port VGA Splitter 350MHz (VU-VS01)
1 Pieces / (Min. Order)
2 Port VGA Splitter 350MHz (VU-VS01)
1 Pieces / (Min. Order)
-
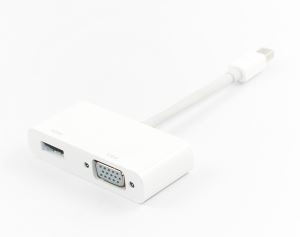 MINI DP TO HDMI+VGA (VU-CA04)
1 Pieces / (Min. Order)
MINI DP TO HDMI+VGA (VU-CA04)
1 Pieces / (Min. Order)
-
 HDMI TO AV (VU-CA03)
1 Pieces / (Min. Order)
HDMI TO AV (VU-CA03)
1 Pieces / (Min. Order)
-
 Type-C TO Type-C (VU-TC03)
1 Pieces / (Min. Order)
Type-C TO Type-C (VU-TC03)
1 Pieces / (Min. Order)
-
 HDMI Cable Laptop To Tv (VU-HDC01)
1 Pieces / (Min. Order)
HDMI Cable Laptop To Tv (VU-HDC01)
1 Pieces / (Min. Order)
-
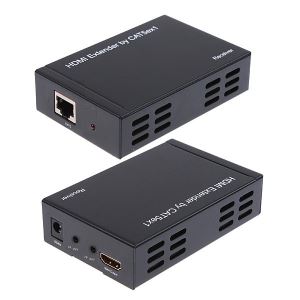
 HDMI Extender Over Ethernet (VU-EX03)
1 Pieces / (Min. Order)
HDMI Extender Over Ethernet (VU-EX03)
1 Pieces / (Min. Order)
-
 HDMI Over Cat5 With IR (VU-EX10)
1 Pieces / (Min. Order)
HDMI Over Cat5 With IR (VU-EX10)
1 Pieces / (Min. Order)
-
 HDMI Extender Over Lan (VU-EX11)
1 Pieces / (Min. Order)
HDMI Extender Over Lan (VU-EX11)
1 Pieces / (Min. Order)
-
 HDMI Extender Over Single Cat5 (VU-EX01)
1 Pieces / (Min. Order)
HDMI Extender Over Single Cat5 (VU-EX01)
1 Pieces / (Min. Order)
-
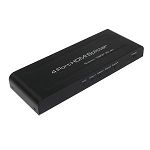
 1x16 HDMI Splitter 4K*2K (VU-S11)
1 Pieces / (Min. Order)
1x16 HDMI Splitter 4K*2K (VU-S11)
1 Pieces / (Min. Order)
-
 1x8 HDMI Splitter 4K*2K (VU-S04)
1 Pieces / (Min. Order)
1x8 HDMI Splitter 4K*2K (VU-S04)
1 Pieces / (Min. Order)
-
 1x4 HDMI Splitter 4K*2K (VU-S03)
1 Pieces / (Min. Order)
1x4 HDMI Splitter 4K*2K (VU-S03)
1 Pieces / (Min. Order)
-
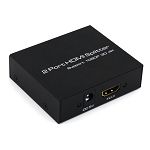 1x2 HDMI Splitter 4K*2K (VU-S0102)
1 Pieces / (Min. Order)
1x2 HDMI Splitter 4K*2K (VU-S0102)
1 Pieces / (Min. Order)
 Frequent updates ensuring high quality data
 Over 5000 customers trust us to help grow their business!


 Menu
Menu